Awards time in Uptown Saint John

The 2010 Live Life Awards are on and there is a restaurant category where oodles of nominations are flowing in. You can add your voice by dropping in and having your say on the “Best Restaurant of the Year” in the Uptown area.

Of course, we’ve a particular bias. 🙂

But there are so many fabulous places to eat in Saint John’s Uptown, we’re thrilled to be one of them. This isn’t a competition so much as it’s a celebration of what we have and what we’re building on in the Uptown.

By the way, there will be a ceremony June 24 at the Saint John Theatre Company. You can get information on it, as well as information on getting a ticket to the event, by visiting the 2010 Live Life Awards web site. In their words, “… we’re having a party.”

In the meantime, if you want to nominate a restuarant, the place to go is here (simply add it as a comment).

One last note … Urban Deli also qualifies in a couple of other categories. Such as New Business of the Year (we opened last July) and Commercial Space of the Year. If you want to toss a nomination our way, we’d love to get it!

(Photo of the Urban Deli is by Beaver Smith, bigdayfoto, Saint John.)

Share

Liz and the Deli in the Telegraph-Journal

Herb Duncan has written a little something up for today’s Telegraph-Journal. It’s called Raising the Bar at the Urban Deli and it’s actually an astonishing piece when you consider that Liz is actually kind of shy about being in the spotlight.

Yes, if you’ve met her that’s a bit hard to believe but it’s true. Herb’s article is absolutely wonderful, though admittedly we’re not really objective on this one. 🙂

We’ve been a bit silent online recently (this happens every so often). If you read the piece in the paper, you may get a sense of why. Quite often we get so busy with the business of the restaurant we neglect the business of the Deli online.

We plan to get that changed and get the stream flowing again soon.

Share

Bourbon Quarter – worth the reservations

*For reservations call 506-214-3618

Bourbon Quarter imageOpening and trial nights are never easy for new restaurant owners and their staff.  There is always something that is unfinished to the perfectionist owner who wants nothing more than to be a crowd pleaser for his or her future clientele. The old saying about having one opportunity to make a good first impression is true and it can be overwhelming.

On Friday, March 26, I and 14 others in our party were lucky invitees to the friends and family night at Bourbon Quarter.   The menu presented for the evening was $20 with the following choices:

Appetizer:

  • Grilled Watermelon with goat cheese, cherry tomatoes, spring greens and buttermilk vinaigrette
    or
  • Louisiana Fried Clams

Entrée:

  • Crisp Skin Salmon with roasted fingerling potatoes, julienne vegetables, fried onions and beet butter
    or
  • Supreme Chicken Breast with truffle whipped potatoes and glazed vegetables

For dessert (for an additional $5) there was Crème BrulĂ©e, Madagascar vanilla bean (meaning “burnt cream”).

The review:

I’ve taken a hybrid of my own personal experience during my evening as well as those of other people in our party.

Like most foodies, I had to try everything regardless of any extra cost.

Grilled Watermelon:  When the grilled watermelon appetizer arrived the presentation was beautiful. The flavours were something I have not tasted since visiting the Rossmount in St. Andrews just before Christmas. Those of us who tried it (including myself ) were using our pinky finger and spoons or forks to capture the remaining buttermilk vinaigrette on the plate. Need I say more?

Louisiana Fried Clams:  This was a great idea but the consensus at the table was that this appetizer needs work.  There is always one dish for a new restaurant that will be their nemesis. Owners love feedback and I shared mine with Chef Brad. (Our nemesis at the Urban Deli, and as simple as it sounds, was our homemade baked beans.)

Crisp Skin Salmon:  OMG!  I don’t think they could have cooked the salmon any better; the flavor was delicious and the plate presentation was perfect. It was a nice follow-up to the Watermelon appetizer.

Supreme Chicken Breast:  The chicken was cooked to perfection (mine was) and there were a couple of dishes that were on the cooler side but tasty to the hungry visitor.

Dessert:  Crème Brulee was the intent and as it turned out…someone forgot the dessert torch for the brulee; therefore, it was more of a custard (a very good custard too!). When we finished, everyone’s dish was empty.

Plate presentation at Bourbon Quarter is beautifully simple. I haven’t seen their static menu or their pricing. For this friends and family night our cost for two for the evening was $116 not including the gratuity. Our service was excellent….Ashley, who also works at the Urban Deli, did a phenomenal job given the size of our party!

Wine was only available by the glass. Beer, tap beer, martinis, cocktails and non-alcoholic drinks were also being served by bartender extraordinaire Gordon, former manager of Sebastian. Mike Verner is hiring a sommelier from Ontario.  We should see a real focus on wine and food pairings in the future.

The Bourbon Quarter room with its renovations was trendy, upscale and comfortable.  The renovations would have had more of an impact if you had visited the location prior to it being Bourbon Quarter. Vision goes a long way. I could feel a bit of the same flare from the designers of Thandi’s, who also did Bourbon Quarter. The end result? It works for both restaurants.

Thank you to Mike Verner, Sean Verner and their families, Chef Brad Richard, and all the staff.  Great work!

Visit Bourbon Quarter at 112 Prince William Street, Uptown Saint John.

***

Bio: Liz is the owner of the Urban Deli. With a sister in Manhattan, she has visited New York many times and invariably studies the Big Apple’s famous delis.

Share

Cooking class – a new first for Urban Deli

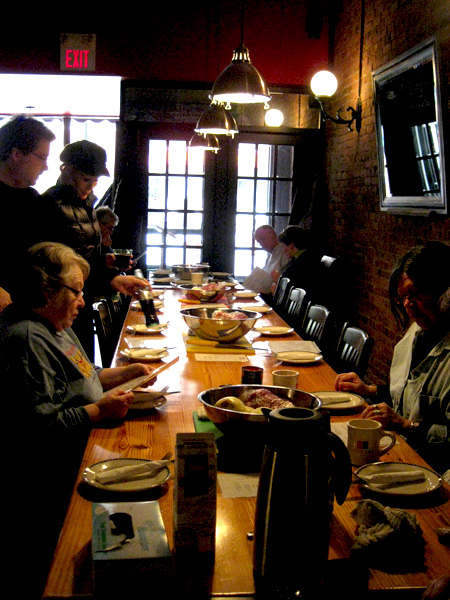
cookingclass_201003_03_1A group of twenty or so people convened at the Urban Deli on a sunny Sunday afternoon on March 14th to participate in the first cooking class hosted by UD. The restaurant is normally closed on Sundays, but Liz decided to open up for a few hours to host this reservation-only event. Bob McVicar was the instructing chef and the subject of the day was Italian-style cabbage rolls.

The afternoon began with some informal introductions and delicious snacks (check out this sautĂ©ed red pepper recipe), and then we all found seats at the communal table in groups of four. To ensure that the objective of the class was clear, Bob served us each a sample of his Italian cabbage rolls that he had put together a couple of days prior – Bob swears that they are better a few days after making them. We also sampled some homemade Italian sausage that UD has recently started making in-house.

Next, we worked in our groups of four to create some of Bob’s Italian cabbage rolls. We made half of the recipe below, which resulted in a roasting pan full of cabbage rolls. Bob did some of the prep work before we arrived and had already softened and peeled the cabbage leaves off of the head for us as well as having prepared the tomato sauce. Our main tasks were to create the filling and put the rolls together.

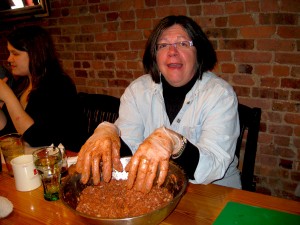
Cooking class - be willing to get your hands dirty.Bob’s recipe for the filling is simple to put together and rolling it in the leaves is pretty easy once you get used to it. You’ll need to be willing to get your hands dirty for this dish, so dig in and have some fun. Just follow the recipe and preparation instructions below and you’ll have no problems.

After assembling all of our rolls, we packed them up and topped them with some delicious tomato sauce. Each participant received a portion to take home, at which point they simply had to be baked and served fresh, saved for a few days before eating, or placed in the freezer to consume at a later date.

cookingclass_201003_05_1The cooking class was an enjoyable afternoon and a great value at only $12 per person, which was to help cover some of the costs. Beverages were also available to purchase and the snacks continued to flow throughout the afternoon. This cooking class was a successful first for UD and I suspect that there will be many more to come. Stay tuned to urbandeli.ca for info about future cooking classes that Liz has in the works.

Italian Cabbage Rolls – download recipe by Bob McVicar:

***

This article was written by our guest author, Trisha Gallant, who is also an Urban Deli regular.

Share

Pork fried rice with veggies

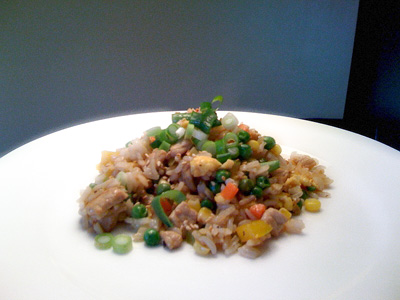
Pork fried rice with veggies (photo - Dan Jones)I thought I was going to make chicken fried rice, but I guess that bag in the fridge that my girlfriend took out of the freezer was actually pork.

I wouldn’t really call this a recipe because one could put anything they want in this dish and really, the only thing required is to cook the rice early and then cool it in the fridge. All Chinese restaurants use this technique for fried rice, or at least they should. Using freshly cooked rice will result in a huge lump of goo.

Mixing the other ingredients with the rice in a bowl and then serving isn’t fried rice, although it may also be tasty.

To start off, I seasoned some vegetable oil by combining it in a small pot with fresh ginger, garlic, lemongrass, a chili pepper, star anise, and white peppercorns. I let this simmer for about an hour, before straining and setting it aside until it was time to start cooking.

I used a couple hundred grams of pork, an egg, half a yellow bell pepper, a small handful of green beans, five small mushrooms, one stalk of celery, a small carrot, and 1/3 cup of frozen peas and corn (thawed in microwave, water drained).

I stir-fried the meat, veggies, and egg on medium high heat, and then added the cooled rice, along with several shakes of soy sauce, a few drops of fish sauce and sesame oil, and a small splash of rice wine vinegar.

I also toasted some sesame seeds and sliced a couple of green onions for garnishing the dish when serving.

***

Bio: Dan Jones is a food, drink, and travel writer from Saint John. Follow him on Twitter: @danjjj

Share

SautĂ©ed red peppers – so versatile!

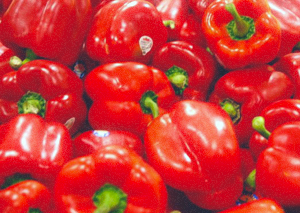
Red peppersThis dish is versatile, easy to make and requires minimal ingredients — and it is so delicious!

The sautéed red peppers are equally great as a stand-alone dish or a  compliment to other dishes such as a topping for steamed chicken, pasta, or salads and served with a nice Italian bread or baguette, or with grilled sausages.

My sister Michael-Ann and her girlfriend Jodi recently visited Saint John from Manhattan (one of my favorite food cities).  Jodi, who also lived in Italy for a few years, prepared one of her many recipes, which were taught to her in the kitchens of Italy.

I made the sautéed red peppers this past Saturday following Jodi’s recipe and found it easy and the results were fantastic!

Ingredients:

  1. Extra virgin olive oil — approx 3/4 to 1 cup (I used a 10.5” skillet – measured the width of the top lip opening of my skillet)
  2. 2 to 3 Garlic Cloves
  3. 8 to 9 red peppers (yellow can be used too and mixed in). Cut into large pieces – skins on. (I used 11 red peppers with my skillet size. I cut each pepper in half, top to bottom, removed the seed core and the top green stem and then cut each half into six long slices, again cutting top to bottom.)
  4. Approximately 1/2 cup Kalamata olives, pitted (I used black olives and wished I had used Kalamata olives simply for the better flavor)
  5. 2 tablespoons of capers (If using dried salted capers less is needed as they can be salty)
  6. Salt

Method:

Coat large skillet with extra virgin olive oil ¾ to 1 cup (approx 1/4 inch).  Add garlic cloves cut into 2 to 3 large pieces.  Heat oil and garlic until garlic starts to brown but do not completely brown the garlic.

Add cut red peppers to hot oil.  Do not worry if the peppers are heaping over the skillet because they will melt down as they are heated.  To help keep the peppers in place use a lid smaller than the skillet and press down.  Slowly start to rotate the peppers as they cook down.  Turn the peppers frequently.  (I cooked the peppers at a simmer and for 1.5 hours … Ok, I started talking and got side tracked … It all worked out for the good though.)

When the peppers are softened in the oil, add the Kalamata olives, capers and salt to taste.  Cook the peppers until the oil turns to a clear red color and the peppers are soft.  There should be no crunch at all to your sauteed peppers.

Serve hot, warm or cold. It’s even better on day two!

***

Bio: Liz is the owner of the Urban Deli. With a sister in Manhattan, she has visited New York many times and invariably studies the Big Apple’s famous delis.

Share

Pulled Pork and Fries

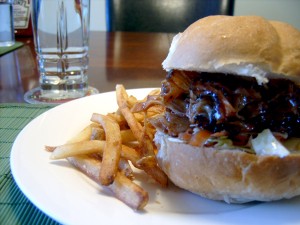
Pulled pork and fries. (photo - Dan Jones)Urban Deli does a great pulled pork and probably has the best frites, or fries as you may call them, in the city. But, on this day, I put together my own version of this tasty treat, which was actually my last order at UD.

It’s quite the process requiring some patience and attention to a few details. However, if you don’t mind such things, the end result will be a fine meal for you and your loved ones.

Here is what you need (see recipe suggestions below):

  1. Pork butt – It’s actually from the front shoulder, and comes as bone-in and boneless cuts. Bone-in is preferred but either will do. It’s a fatty piece of meat with lots of connective tissue. With low and slow cooking, this will result in juicy and tender meat. Sometimes it is called Boston Butt, or pork shoulder. It should look something like this.
  2. Rub
  3. Sauce
  4. Slaw
  5. Wood chips (hickory, apple, cherry, or whatever you have on hand)
  6. Buns – you can make your own or buy a good Kaiser bun that has a nice crisp crust

Rub:

  • Paprika – several tablespoons
  • Oregano – a bit less than paprika
  • Garlic and/or onion powder – a bit less than oregano
  • Cayenne, salt, pepper, cumin, coriander, ancho/chipotle/chili powder in about equal quantities but go with taste here. Make a rub that you like the taste of. Rub this into the meat several hours before you’re ready to cook. Rub hard.

Sauce:

This is a free for all – do what you like here but maintain some sort of balance between sour, sweet, and spicy.  I used:

  • Juice (orange, mango, pineapple, apple, or anything else, maybe even a mixed cocktail – even some beer) – about ½ cup or so
  • Apple cider vinegar or any other vinegar – same amount as you use for juice
  • Ketchup – about ½ cup
  • Brown sugar – 1/3 cup
  • Onion and/or garlic powder – a few shakes
  • Tabasco – a few shakes
  • If you want, add a few squirts of your favourite store bought BBQ sauce

Whisk well. It should be a pretty runny affair so it can absorb into your pulled pork. It won’t be like a store bought BBQ sauce.

Pork:

I started my pork on a Weber charcoal grill with all the coals put on one side and the pork up on a rack on the cool side. I let that smoke for 1 and a half hours. After that I could have added more coals to the Weber, but instead I transferred to my propane grill for several hours until tender. I cooked it at about 300-350 degrees, allowing the fattiest part to drip down into the meat.

When done, don’t bother letting your meat rest as you normally would. Throw it into a bowl and tear apart with two forks, or your hands if you can stand the heat. Mix with the sauce. This will allow the dry parts of the meat to absorb the sauce (this is why I asked you to keep it runny). Let sit in the sauce for several minutes and then serve on a bun with slaw.

Slaw:

  • Cabbage, half a small head or full head if serving several people
  • Carrot, shaved
  • 1 or 2 tablespoons of olive oil
  • 2 tablespoons of salt
  • 2 tablespoons of sugar
  • ½ cup or so of vinegar, whatever type you prefer

Let sit and stir a few times over a few hours.

Strain before putting onto the bun.

Fries:

Russets are best. Cut into fry sized pieces. Soak in water while your grease heats up. A proper deep fryer is safest, but do as you wish. Double frying makes the best French fry, always. First fry is to get the consistency of a tender potato (at about 325 F or so), no colour, about 5 minutes. Make sure you put the potatoes into the grease as dry as possible to avoid your grease from “boiling over” – it can be very dangerous when a lot of water hits hot oil. After your first fry, the longer you let the fries sit, the better. 30 or so minutes is great. Then, put the fries back into hot oil (360-380 F) and cook until golden and crispy, another 4 or 5 minutes but keep an eye on things. Sprinkle with kosher or sea salt, toss, and serve.

***

Bio: Dan Jones is a food, drink, and travel writer from Saint John. Follow him on Twitter: @danjjj

Share